Making flashing LEDS is one of the simplest ways to demonstrate the timing capability of microprocessors.
Here are some techniques you can do:
- Timer interruptions
- Standard Arduino delay
- Delay from FreeRTOS
Standard Arduino Delay
Delay on Arduino explained at https://www.arduino.cc/reference/en/language/functions/time/delay/
On standard Arduino software such as Arduino Nano and UNO, this delay is implemented with the Loop software.
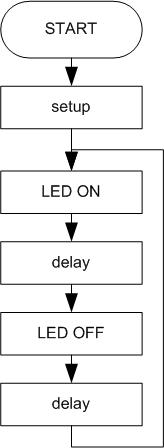
Example of a software using this delay is an example of Blink software on Arduino (https://www.arduino.cc/en/tutorial/blink)
The flow Diagram of the Blink program is as follows
A Delay on FreeRTOS
FreeRTOS allows the Arduino software to have multiple loops at the same time.
Ported FreeRTOS for Arduino UNO and Nano can be viewed at https://github.com/feilipu/Arduino_FreeRTOS_Library
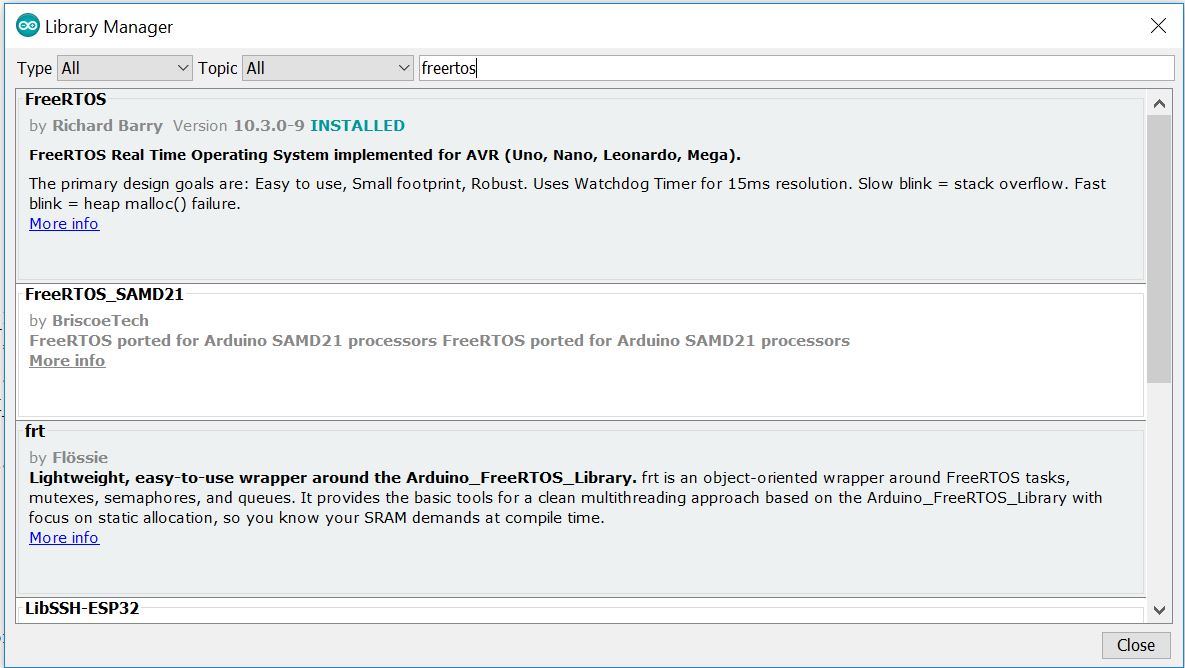
This FreeRTOS Library can be installed on the Arduino IDE from the Tools-> Manage Libraries menu. Then search by keyword FreeRTOS.
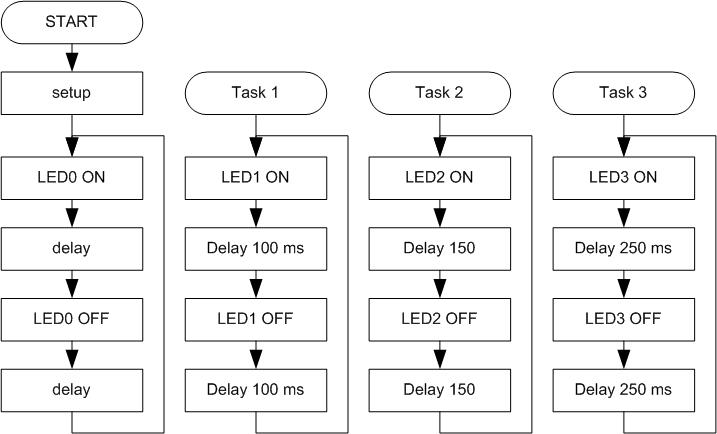
For example, here is a flowchart diagram of a program that makes the LEDS blink with 3 loops. Each LED has a different frequency.
The Source code can be viewed at https://github.com/waskita/embedded/tree/master/atmega-blink-freertos
The FreeRTOS function used is
- xTaskCreate to create a new task
- xTaskGetTickCount to get a tick on the OS at a time
- vTaskDelayUntil to create a delay
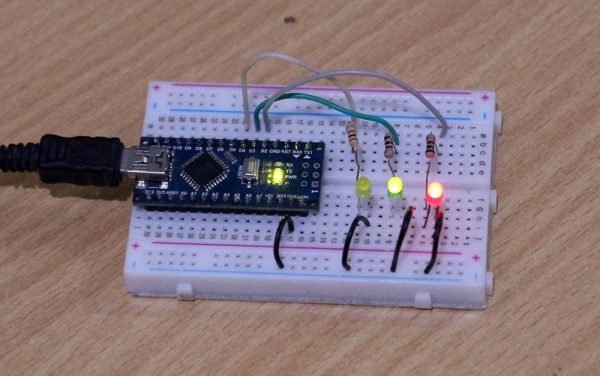
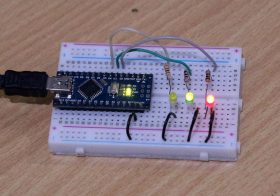
Here’s the Arduino Nano hardware demo
Timer Interruptions
Under construction