Bird Sounds with Arduino

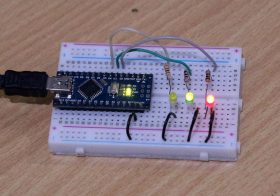
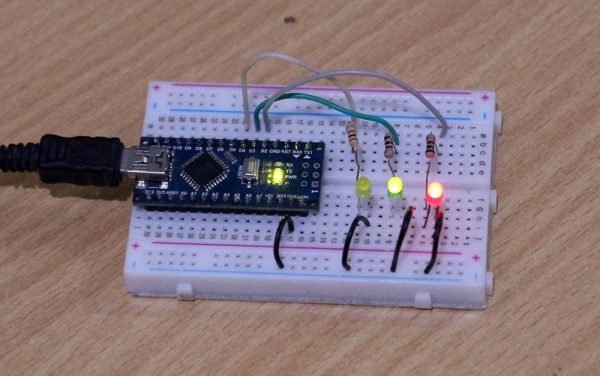
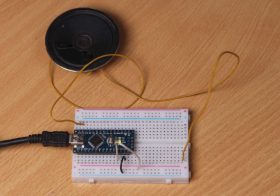
Here is an example of a bird’s voice generation using the Arduino Nano microcontroller (ATmega328)

The code is taken from http://120.107.171.121/~tywua/sub/ISAR/Chirp.ino, apparently from a professor’s website at National Changhua University of Education, Taiwan.

Arduino Bird Sound Generation

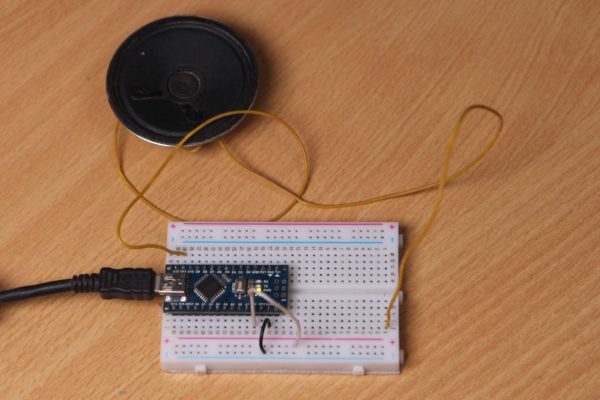
Here is an example of the resulting sound:

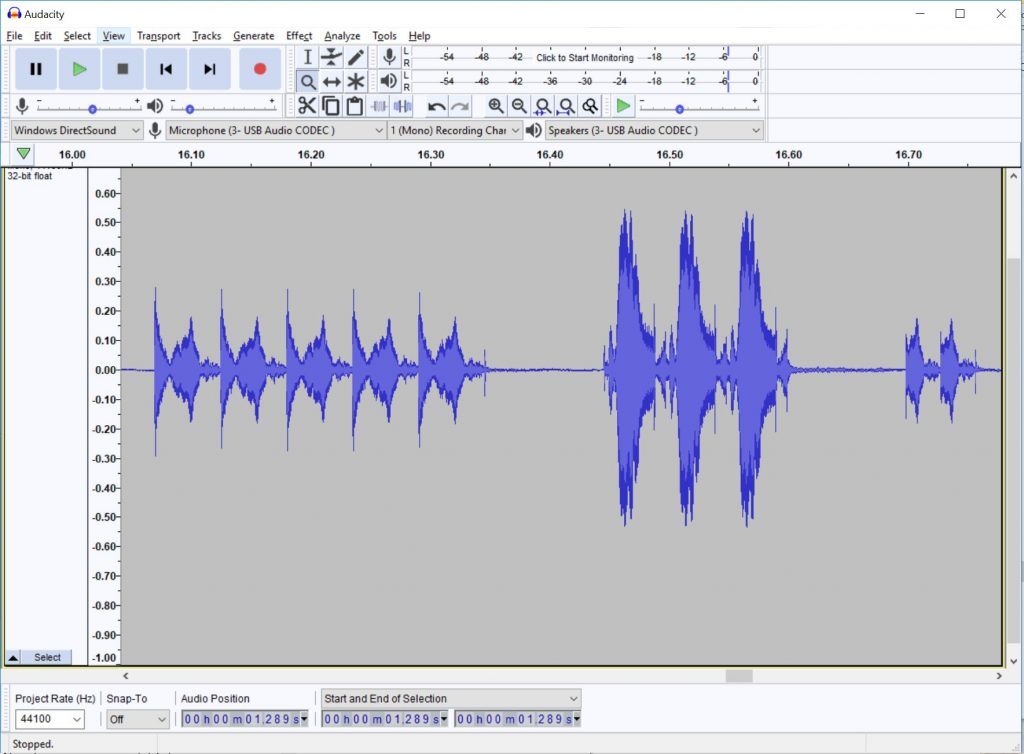
Here’s the signal form in the Audacity app for 1 set of tweets only:

Here’s the source code (from http://120.107.171.121/~tywua/sub/ISAR/Chirp.ino)

int piezopin = 11;  Select the PIN for the speaker
int angulo = 0;
int counter = 0;


void Setup () {
  pinMode (Piezopin, OUTPUT);
}
void Loop () {
  Angulo = random (10.50);
  Counter = random (2.6);

  highChirp (5, Angulo/10);
  Delay (100);
  lowChirp (Angulo * 4.2);
  Delay (100);
  Tweets (counter, 2);
}

void highChirp (int intensity, int chirpsNumber) {
  I.
  int x;
  for (int veces = 0; veces<=chirpsNumber; veces++){
    for (i = 100; i > 0; I--)
    {
      for (x = 0; x<intensity;  x++)
      {
        digitalWrite (Piezopin, HIGH);
        delayMicroseconds (i);
        digitalWrite (Piezopin, LOW);
        delayMicroseconds (i);
      }
    }
  }
}

void lowChirp (int intensity, int chirpsNumber) {
  I.
  int x;
  for (int veces = 0; veces<=chirpsNumber; veces++){
    for (i = 0; i<200; i++)
    {
      digitalWrite (Piezopin, HIGH);
      delayMicroseconds (i);
      digitalWrite (Piezopin, LOW);
      delayMicroseconds (i);
    } 
    for (i = 90; i > 80; I--)
    {
      for (x = 0; x<5;  x++)
      {
        digitalWrite (Piezopin, HIGH);
        delayMicroseconds (i);
        digitalWrite (Piezopin, LOW);
        delayMicroseconds (i);
      }
    }
  }
}

VOID tweet (int intensity, int chirpsNumber) {

I.
int x;
Normal chirpsNumber 3, normal intensity 5

for (int veces = 0; veces<chirpsNumber; veces++){
  for (int i = 80; i > 0; I--)
  {
   for (int x = 0; x<intensity;  x++)
   {
     digitalWrite (Piezopin, HIGH);
     delayMicroseconds (i);
     digitalWrite (Piezopin, LOW);
     delayMicroseconds (i);
   }
  }
}
Delay (1000);
}


Blinking LED on Arduino With Interrupt and RTOS

Making flashing LEDS is one of the simplest ways to demonstrate the timing capability of microprocessors.

Here are some techniques you can do:

  • Timer interruptions
  • Standard Arduino delay
  • Delay from FreeRTOS

Standard Arduino Delay

Delay on Arduino explained at https://www.arduino.cc/reference/en/language/functions/time/delay/

On standard Arduino software such as Arduino Nano and UNO, this delay is implemented with the Loop software.

Example of a software using this delay is an example of Blink software on Arduino (https://www.arduino.cc/en/tutorial/blink)

The flow Diagram of the Blink program is as follows

Flow Diagram of Blink ()

A Delay on FreeRTOS

FreeRTOS allows the Arduino software to have multiple loops at the same time.

Ported FreeRTOS for Arduino UNO and Nano can be viewed at https://github.com/feilipu/Arduino_FreeRTOS_Library

This FreeRTOS Library can be installed on the Arduino IDE from the Tools-> Manage Libraries menu. Then search by keyword FreeRTOS.

The FreeRTOS library installation process

For example, here is a flowchart diagram of a program that makes the LEDS blink with 3 loops. Each LED has a different frequency.

Flashing with FreeRTOS

The Source code can be viewed at https://github.com/waskita/embedded/tree/master/atmega-blink-freertos

The FreeRTOS function used is

Arduino with LED flashing

Here’s the Arduino Nano hardware demo

Timer Interruptions

Under construction